

I don't know about you, but with drool-worthy shows like Fixer Upper, I was on the hunt to for my own farmhouse table. Having grown up in California not far from the Santa Cruz beaches, but at the same time always loving the mountains in Lake Tahoe, I am torn between a love for the beach and the rustic. This table is a combo of the beach, the rustic, and Joanna Gaines. Let me tell you how it was done...
First you scour Craigslist (or any other for sale site, or garage sale,) for something that needs some TLC like this baby:

I bought this 7' table and 8 chairs for $75 via a seller from CL
who just happened to live around the corner from me. Score.

The table top not only had a ton of gashes, (which I thought added character,)
but water stains too (which do NOT add character)

And it is really hard to tell from this angle, but the table was very bowed,
with the two sides coming up.

This was the shape the chairs were in when I got them. Some had the cushions still attached, some did not. Taking 220 grit sand paper and barely sanding (wiping) them down, the finish just flaked off and left me an almost bare wood chair. I have never dealt with furniture in this rough of shape.

After tearing off the fragments of fabric hanging on to underneath the cushions, I saw this. Well actually it was worse than this. Many of the cushions had lost their cushi-ness. I found an old gel bath mat that I had been saving for who knows what, and cut it into the size of the seat. To fix the issue of feeling springs poking into one's rear end, I fed these sections of bath mat under the springs.

And this is what the tops of the seats looked like, (however they were much dirtier than this picture depicts). I vacuumed them before I re-upholstered them.
So as you can see, I had my work cut out for me. But like they say on Flip or Flop (another one of my favorite shows), "the bigger the disaster, the bigger the makeover."
Chairs
First, let's cover the re-covering of the chairs. I knew I wanted a gray and white theme for the table, so I went to Hobby Lobby to buy some durable fabric. I decided against a print because it is too hard to center the print on each chair and not waste a lot of good use-able fabric. I also decided to choose a fabric in their "home fabrics" section, (I think that is what they're called,) because they are wider and thus you get more fabric per yard. When covering 8 chairs, you need a lot of fabric. I believe I bought 2.5 yards of a gray canvas-like fabric, which with my 40% off coupon came to $27.19. I also bought about that same amount of the black underlining fabric (not sure it's technical name) for $2.90 (also using a 40% coupon a separate day).
I laid down the seat cushions on my fabric, and cut the gray one big enough to pull over the top and staple just under the bottom edges. I first pulled the fabric over the back of the seat and stapled underneath, and then did this for the front. Then I pulled the fabric over the sides and stapled, and lastly did the front corners. Any excess, (bunchy) fabric I cut off after stapling. I then laid all of these cushions on the black underlying fabric and cut it to size. I then stapled it just so it covered up all of the staples from stapling down the gray fabric.

Horrible lighting, but this is the best I got...

Major improvement huh?
I then sprayed each seat with 1 can of Scotchgard's Fabric & Upholstery, which is the cheapest at Walmart (or walmart.com) for around $5/can, (trust me I shopped around, and this is by far the cheapest price). One can was enough to cover the 8 seats.
For the chairs themselves I used 220 grit sand paper to wipe off the finish that was flaking off, as well as prep the wood for the paint to adhere to. There was gunk and grime (or part of a stain and poly gone wrong ages ago?) accumulated on some of the chairs that I used a flathead screw driver to get off. That was slow and tedious. And then I had to sand down a section that had been chewed up by a dog I am guessing. I then filled in the sanded down bite marks with wood putty, then sanded again after the putty dried. Also a few screws were missing from the chairs so they were rickety, but after tightening loose ones and replacing missing ones, the chairs were good as new.
Now to paint....

In case you want to use the same color, here is a picture of the mixture the Sherwin William's rep at Lowe's mixed up for me. The color is SW Iron Ore. Look up that color on Pinterest and you will see how beautiful this paint color is.
Originally I thought to paint the chairs white to match the base of the table. However, after researching Fixer Upper tables and chairs, Joanna always seems to choose a color similar to black for the chairs.


See what I mean? These were just the first three results I found via my search.
So why does Joanna do this I asked myself? I didn't get to ask her, but these are why I think she does: 1. Provides nice contrast, and most importantly, 2. It hides dirt way better than white chairs do, and dining/kitchen chairs get DIRTY. Since Joanna is the expert, I followed her lead and went with a dark color. However, I didn't want black. I wanted something a little more industrial looking and thought "Iron Ore" sounded like a good fit.


Now to attach the cushions to the chairs. I had my 9 year old son sit on the cushions once I placed them how I wanted them on the chair. I then did acrobatic moves underneath to maneuver my screwdriver in the limited spaces to attach a screw in each of the four corners. Then I stood back and did a happy dance because they looked so good! Phew!


Table
Next came the table. First I started with the curvy, water stained top. Unfortunately I didn't take any pictures of this step, but I turned the tabletop upside down, took off the wood strips along the bottom (as well as all of those plastic guides that were on it)...

...and screwed in four new wood strips along the bottom of it (going from side to side). At first it was hard to screw in the screws at either end due to how warped the tabletop was, but after it laying upside down like this for many, many days due to crazy weather, (we got 18 inches of snow one night in the middle of March...thanks Colorado), the bowing factor was mostly resolved. (Sorry no picture of this).
I then flipped the top back so I could sand the top. I started with my belt sander at 80 grit. This took off the top layer that had all of the water damage. I then used my hand sander with 100 grit, then 150 grit, and lastly I sanded it with 220 grit so it was so smooth and soft.
I then used wood putty to fill in the gaps (I could've done this before all of the sanding. Oops). Since I didn't have enough of the color I needed, I used sawdust from my sanding, and mixed it with wood glue. Not sure the exact quantity, but probably 2:1 ratio with sawdust being what you use more of. If you're like me you can mix it up with a popsicle stick and add more of whatever you need until you have a putty that isn't sticky. Fill in the holes and cracks and then sand it back down.
Before:

After:

Since the wood had a lot of natural dings, (it is pine after all and pine is super soft and easily dinged up), I embraced that fact and dinged it up more with a mallet, a screw driver, etc.
Stain, Whitewash & Polyurethane
Then I used an old t-shirt (I like to save all old socks and cotton t-shirts for staining wood. They make excellent rags,) and dipped it in Rustoleum's Weathered Gray stain a little at a time and wiped it in the direction of the wood grain.

I did a lot of research on the best gray stain and couldn't decide between this or the Sunbleached color that has a mixture of brown, white and gray. For this I wanted something with more depth and was more of a cool than a warm color, but in general I think Sunbleached is a good way to go.
As you can see in the above picture though, I felt like the gray was too boring. I felt like it needed more depth. So after putting on one coat of the gray stain, I mixed up some flat white paint I had on hand in roughly a 1:1 ratio with water. I then dipped another t-shirt rag in this mixture and white washed over the gray stain. I did a wipe on wipe off thing like Mr. Miyagi teaches, but went with the grain (not in circular motions like the movie). I did not use another rag to wipe it off, I just worked in small sections wiping the whitewash into the wood until I got the look I liked. I purposely left some streaks, and especially like how the whitewash gathered in crevices in the wood, and on the edges.
After I got the look I wanted, I let it dry and then applied the polyurethane. Rather than use a brush like the can suggests, I used an old (clean) sock. I dipped it in and wiped the poly from end to end making sure I didn't use too much or too little. I use this method for gel stain and the gel topcoat, and figured I would try it with regular stain and then poly. It was so easy and turned out beautifully. I allowed a day of drying time after each coat of poly, and in between the 1st and 2nd, and then 2nd and 3rd, I gently wiped down the dried poly with 0000 steel wool to keep everything feeling smooth. Two coats is typically enough for most surfaces, but when dealing with a table that will be wiped down a lot, be spilled on, or have hot items placed on it, 3 coats is the recommended amount.

I just love that it still looks like wood, but has a calm, natural, beach-weathered look.

Table Base:
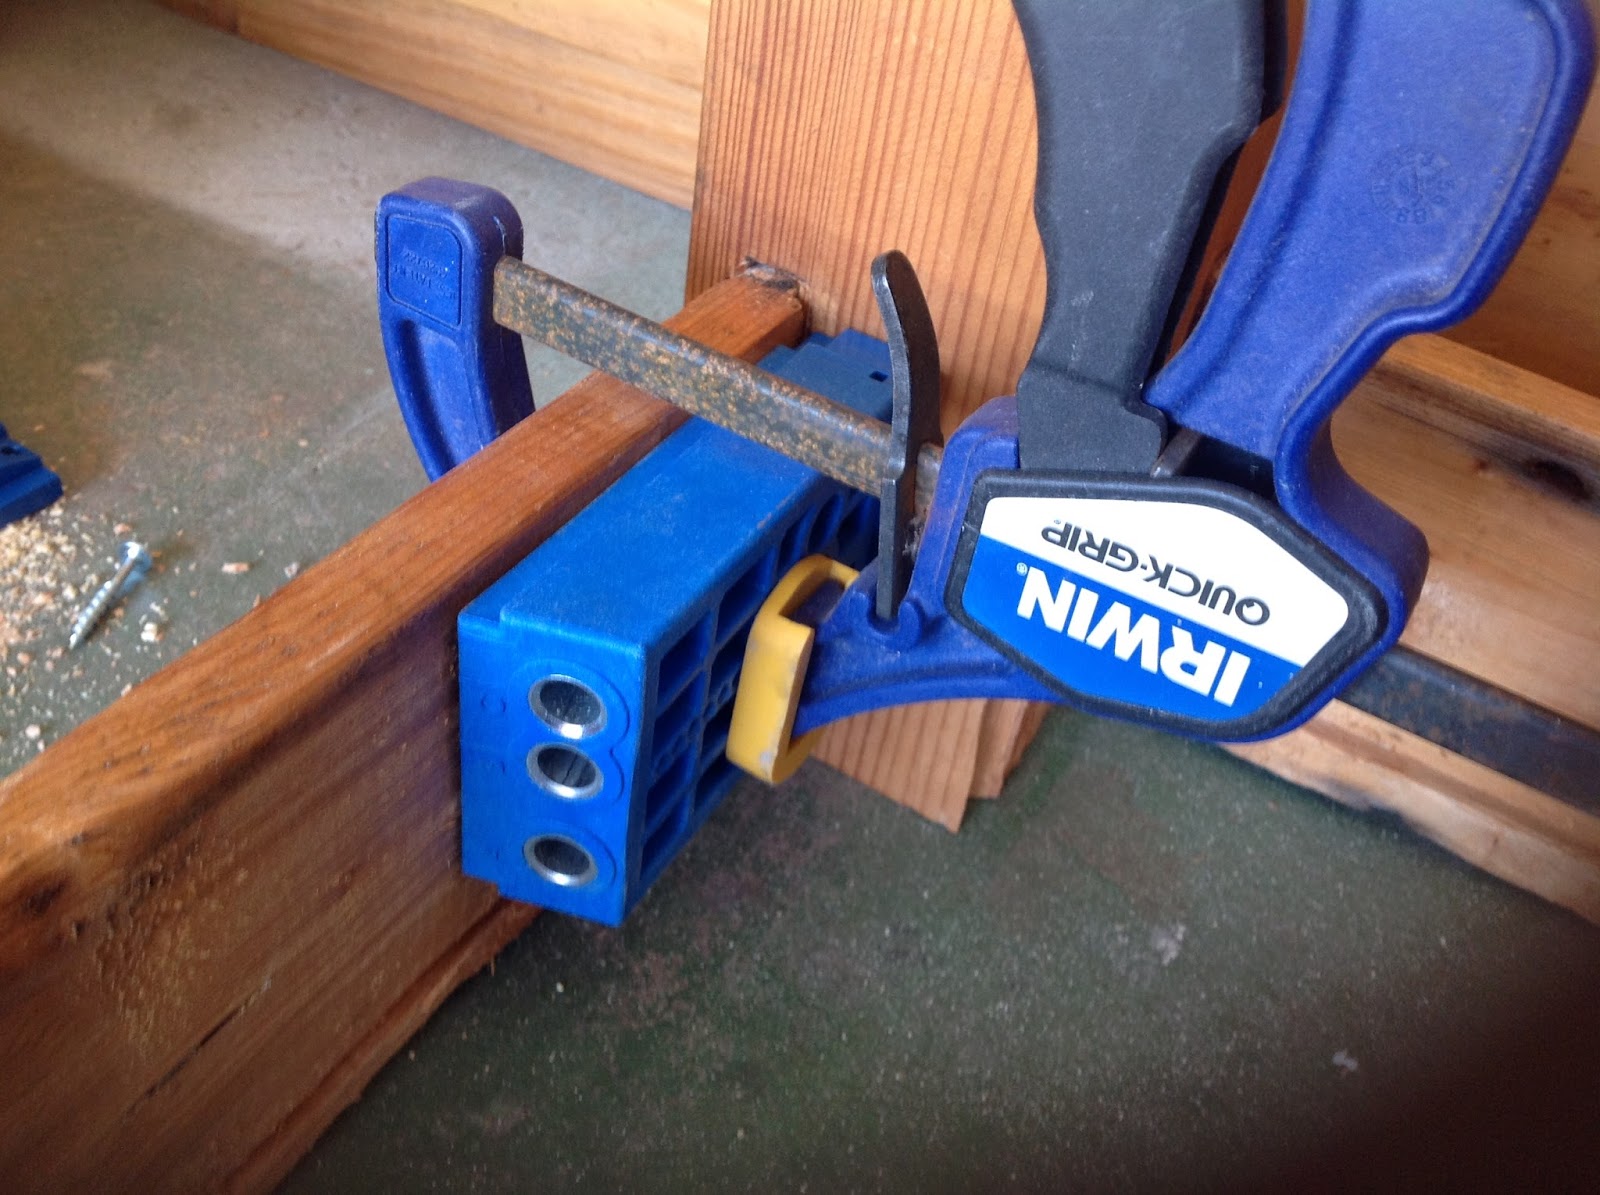
This part was the trickiest part. Because I got this whole set for only $75 it had to be in somewhat bad condition. One end of the table was not sturdy, and I could wiggle the legs back and forth. Not a good sign. I first tried pulling the problematic sections apart, but no matter how hard I tried they wouldn't budge. I then tried knocking out the wood plug that was most likely covering up nails or screws, but just ended up gouging the wood.Then I just tried squirting wood glue into the exposed joints and that did NOTHING. So I brought out my Kreg Jig and pulled out the user manual, and watched a YouTube video since I have only used it a handful of times, and found that the kreg jig is portable when dealing with repairs! (See above YouTube video on how to do this). No wonder so many people rant and rave about this thing. (I have the K5 Kreg).
First, I followed the video's advice. I got the screws in their little pocket holes and was so impressed at my "handyman" skills, only to wiggle the table leg and it was still as wiggly. DUMB! So I thought and I thought and I thought, and I looked under my tables that I use in our home and found one common feature...

That is my homemade version of what all of my other tables had in their corners. I set my miter saw at 45 degrees and cut the wood, and then turned it to the opposite 45 degrees to cut the other side. I then placed this piece of wood in my kreg jig (not while it was in portability mode), and drilled the pocket holes. I sunk in the screws, and then put two screws directly into the table leg. This fixed the wiggle. Hallelujah! (FYI, just doing the pocket holes in the table leg like I originally tried should have done the trick, but I am new at this and am not sure what I was doing wrong. Hopefully you can get away with just doing that first step like the video suggests).
A few areas on the table had cracks that fortunately wood putty took care of. I sanded everything (220 grit) and then cleaned it up, and then sprayed it with this paint...

SW Alabaster.
I chose it because it was pretty, and had a slight gray tint to it, since I was trying to stick with "cool" colors. I got it in a semi gloss, (like the chairs,) for resiliency and ease of cleaning.
 |
| I know I already showed you the chairs, but this is a before and after picture I posted on Instagram after that long day of painting. You should follow me :) |
To attach the tabletop I created these little wooden rectangles:

Originally there were what seemed like a million plastic brackets keeping the table top from shifting. However these did not hold the top to the base. I removed each of those and put 7 of these little wood rectangles directly under the top. I used my kreg and drilled pocket holes for the screws to hold the top down, and then screwed in a screw to the side of the table. These did the trick, and look much better than what was there before.
And that is it! All in all this was my cost breakdown:
$75.00 Table and Chairs from CL
$27.19 Gray chair fabric
$42.33 Paint (2 quarts, and still have a little left over of the Iron Ore and a lot of the Alabaster)
$4.00 Screws
$2.90 Black upholstery fabric for underneath chairs
$2.00 Staples
$4.00 Gray stain (TONS leftover)
$3.00 Wood putty (make sure you get the STAINABLE kind)
________
$160.32 Total
Some of those are estimated amounts since I didn't have the receipts still. I did already have polyurethane and sandpaper, but that all would cost you maybe an additional $10-15.
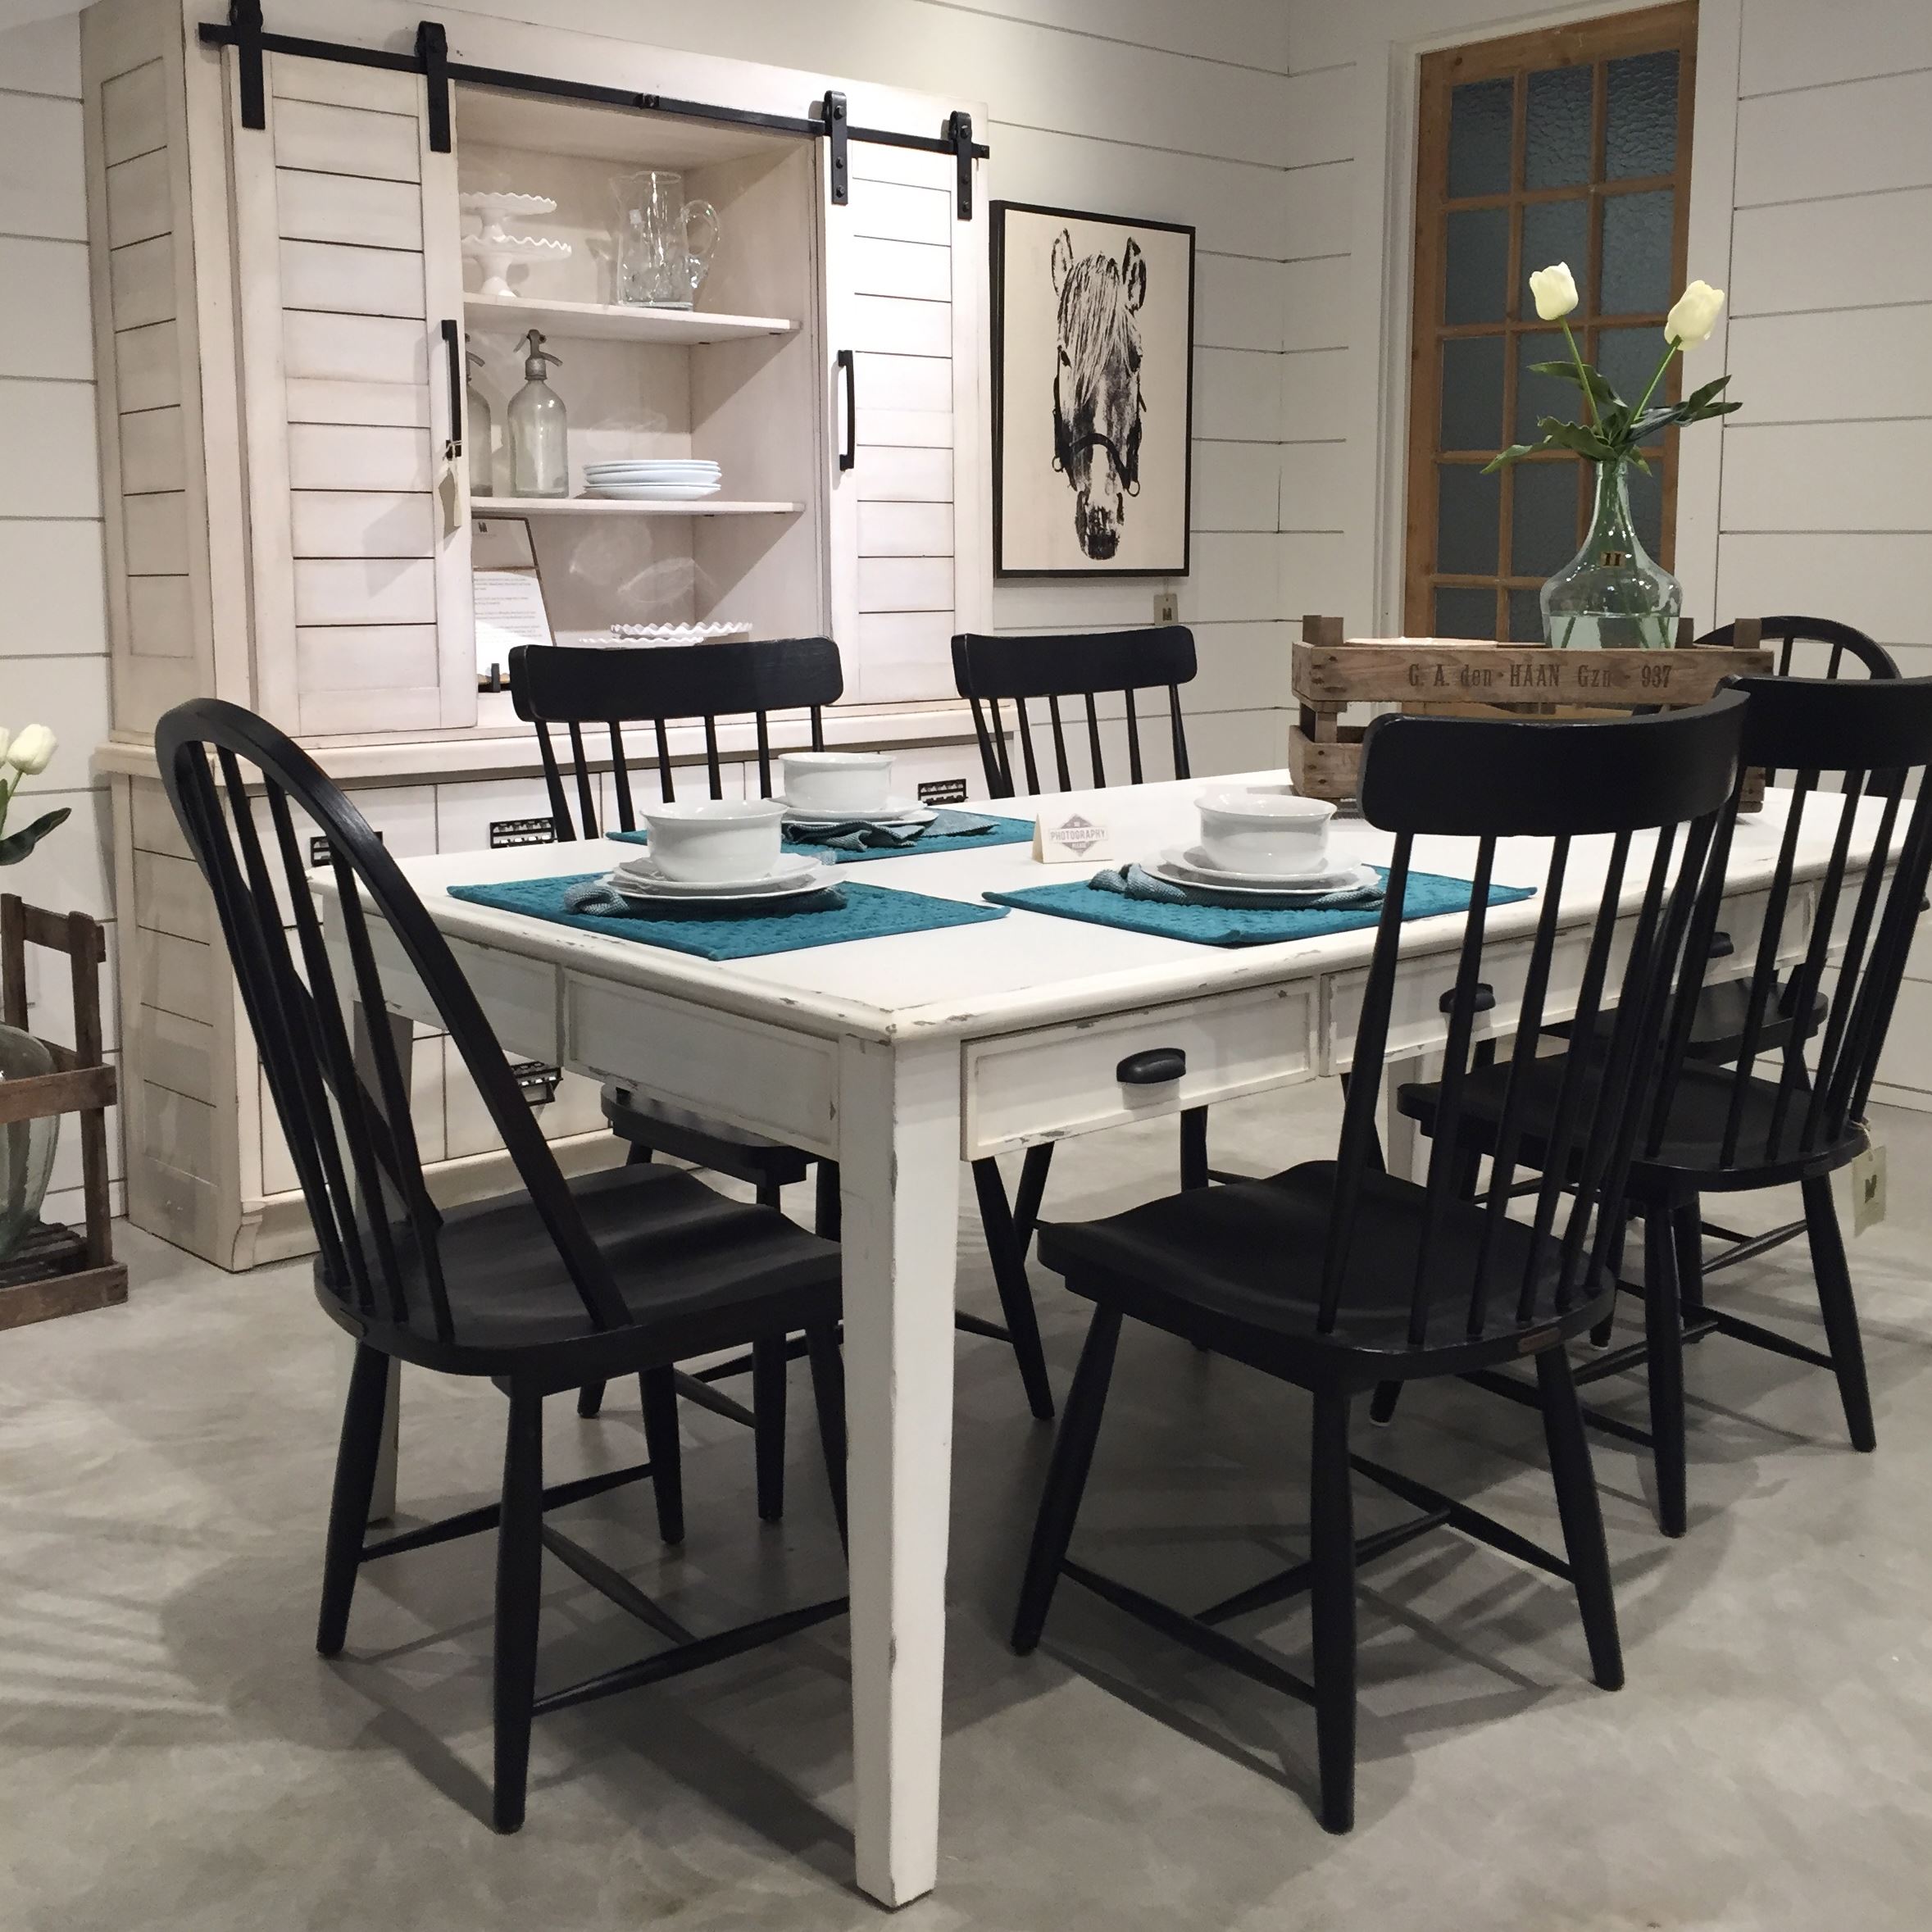
Since I don't have a place to keep this table in my own home (sniff, sniff) I took these pictures to stage it:


I posted it on a local furniture Facebook page and someone fell in love with it. She and her husband were looking for a farmhouse table, that was this color scheme, with enough chairs, and her husband wanted padded chairs. Match made in heaven.
Thanks for reading my whole farmhouse table saga. I hope it helped you in some way. If you've ever made a farmhouse table, what color scheme did you use? Do you have any tips about making a structurally sound table? Or any kreg jig tips? Please share your experiences or ask any questions and I will respond right away! Thanks!