I am excited about sharing the transition of this buffet because it truly looks soooo different than how I got it. An acquaintance from my church was moving out of state and so graciously asked if I would like to have her parents' old buffet from when she was growing up. This brown (poo) beast was probably considered beautiful in the 70's, but in today's trend of fresh and light, it doesn't really fit in. I could write a whole post on the many ideas I had for this buffet when I first acquired it, but thanks to family and friends those (horrible) ideas were laid to rest. My sister Megan, who really needs to start a blog on decorating cause she is seriously gifted, shared a picture she had taken in a parade of homes that she said I had to duplicate...

It looked like this (although this is a close up of the buffet I did, but her's looked identical). She told me to go buy it from Home Depot. After 30 minutes of asking Home Depot employees as to where to find "this" (while showing them the picture on my phone) I found it. It is an aluminum metal sheet and there are several different patterns to choose from. The one I chose was the prettiest (in my opinion), and for 3'x3' the sheet was $32. I was shocked. $32.00?! I hate paying for things, let alone something that should be $12 (another opinion). Anyway, I figured that since the buffet was free to me, I had the paint, and I also was given the knobs, I could handle $32 for beauty.
(Update 8/24/15: Here is the link
to the exact sheet I bought at Home Depot and it is only $22 online. It
is the "cloverleaf" aluminum sheet and it can be delivered to HD with free
pickup. You can see the other sizes and designs available on their
website)
So here's how I did it:
First, retro designs on old pieces can often help make your piece awesome. In this case I didn't like the "pattern". It wasn't dainty or pretty in any way. I felt that this piece was so "heavy" looking and needed to become "lighter". I wanted to put feet on it, but the way the piece was constructed, the base needed to stay put....and honestly adding feet to it would make it look awkward (opinion).


When opening up the doors there was what looked like a solid wood back. But when the back was take off, I found that it looked like the above picture. It was plastic and had more screws you could remove to take the center part out of the cupboard doors. Voila! So many possibilities now! My neighbor helped me discover this, and at first she suggested putting plexiglass in so that you could see through the doors, since a lot of people like this with their kitchen cabinets. However, when you have windows that means the interior needs to be organized, and I didn't want this (cause I am far from organized). Thankfully my sister suggested I get that metal piece to not only hide what is inside, but add the "pretty".
Next, I cut the decorative aluminum sheet using my Dremel Saw Max. Oh my word, can I just say that this little saw ceases to amaze me! My hubby bought it as part of a Dremel set (comes with a Dremel rotary tool, and some other house fixer tool that I have yet to use), for around $120 for all three. Best. Present. Ever. This saw is so dang powerful, yet you can hold it in one hand and totally have control. Love.
I then screwed the metal sheets to the inside of the doors, cut the original wood backs (with my neighbor's help and her table saw) into four pieces to create a frame that could finish off the look of the back of the doors, and then barely sanded and cleaned everything.
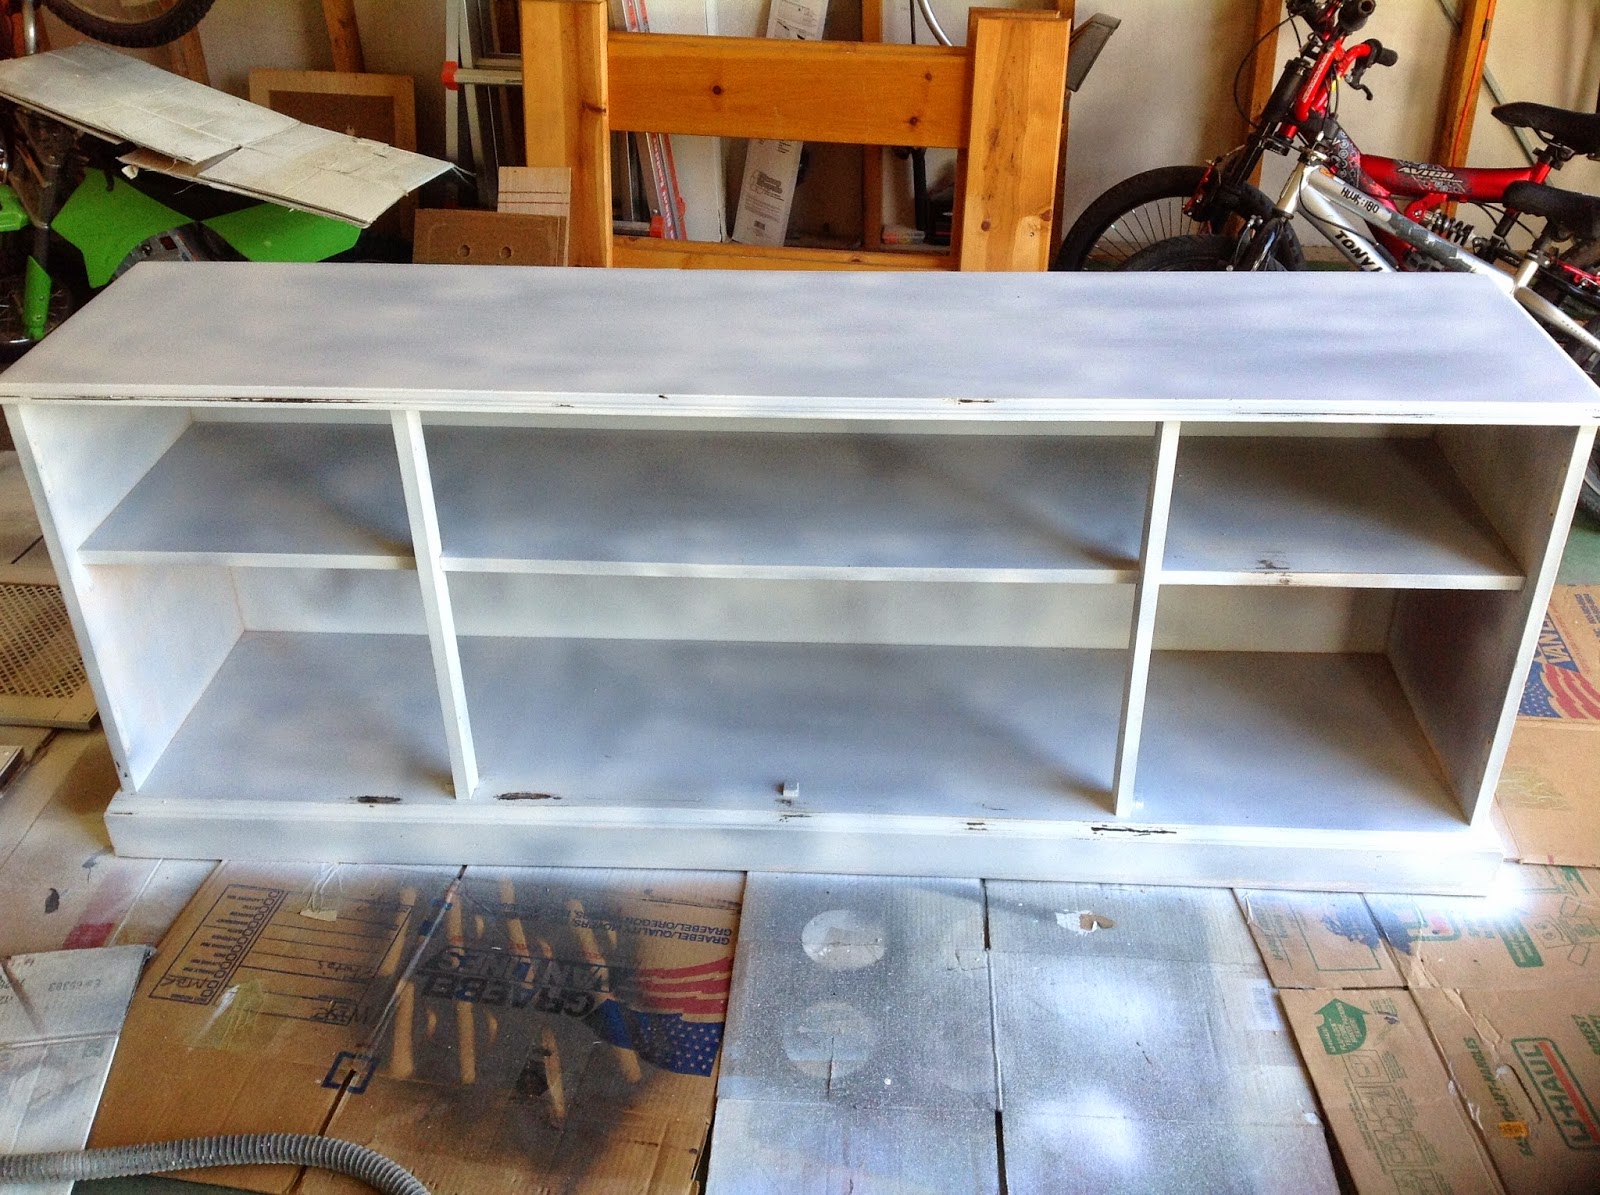
I then sprayed primer over everything.
See all those little brown areas? Well when I primed everything this "goop" kept coming right through. And if you look closely, inside the buffet is pink. The stain and whatever else I missed in my cleaning was coming through the primer. Isn't that what primer is for? That's what I would like to know. I went through coat after coat after coat of primer and the pink and the goop kept coming right through. I was mad. Obviously my cleaning abilities need to step it up. I have heard of good cleaning/furniture prep solutions that I think I need to check into sometime. For old furniture it might be essential because they have years of life in them that might not want to be covered in primer. Anyway, sanding and using a razor's edge didn't fix the problems so I just went ahead and painted.

After I painted I loved the white, but those dang pesty spots and the pink kept coming through. Ugh. So I thought, maybe I should try a glaze...antique it and cover up the imperfections. I called this awesome little local place called "A Simpler Time" that sells Annie Sloan chalk paint and General Finishes Gel stain, as well as upcycles furniture, etc. They said that I could take the gel stain I had and make a glaze using the stain and mineral spirits (30% spirits to 70% stain). I wanted it less brown so I mixed a lot more mineral spirits in and then wiped it on and wiped it off. This is what it looked like...
Not what I had in mind. But I I went with it and did the WHOLE thing that way. My muscles were tired of the wiping on and really trying hard to wipe most of it off, and it looked like this...
I did NOT like it. I have now since read way more tutorials on glazing and would feel comfortable trying it again, but this is not what I wanted for this buffet that was supposed to be pretty, but now looked dirty. My sister stated what I already knew, "It needs to be white, Mimi." So I took off the knobs (which I just screwed in where I wanted them...remember the original hardware was pulls that were in the center of the plastic part of the doors), and sprayed everything white again.
This time everything looked so much better. Sigh of relief. I put the knobs back on and voila!
Now for those of you that have been to my house, it is on the smaller side. Almost every furniture piece I do I re-sell because let's be honest, having four boys in 1500 sq feet doesn't allow for much furniture, let alone pretty furniture. So my hubby and I bring it in and put it against the same wall in our house to stage it and sell it. I wish the wall was longer so that you couldn't see into our kitchen, but oh well, you do what you gotta do with what you got. Now to post it for sale and allow someone with more square feet (or less boys) to have it "pretty" their home up and use it as an entertainment center, extra storage, or as a buffet.
Have you ever used decorative aluminum sheets before? What did you use them for? What was your experience? I love hearing new ideas, hearing tips, and seeing other's transformations so please share!
Thanks!